How to Record an Audio Book at Home
Want to record an audiobook that actually sounds professional? It all comes down to breaking the process into a few key stages: getting your script just right, setting up a decent recording space, nailing your narration, and then polishing the final audio.
With the right approach and a few smart tools, you can turn your book into a genuinely captivating listening experience, all without booking time in a professional studio.
Why Now Is the Perfect Time to Record an Audio Book
The audiobook world isn't just growing—it's absolutely exploding. This massive surge in popularity has opened up a huge opportunity for authors and creators to find a whole new audience that's eager to listen. People are tuning in during their commutes, at the gym, and while doing chores, making audio a uniquely personal way to tell a story.
The Market is Booming
The global audiobook market is seeing some incredible growth, which really shows how much our habits are changing. Right now, it's estimated to be worth around USD 10.88 billion, and forecasts predict it will rocket to USD 56.09 billion by 2032. That’s a compound annual growth rate of about 26.4%.
This boom is largely thanks to smartphones and easy internet access, making audiobooks available to almost everyone, everywhere. You can dive deeper into these trends over at coherentmarketinsights.com.
This isn't just a passing trend; it's a real shift in how people connect with stories. For authors, this opens up some exciting doors:
Reach a Wider Audience: You can tap into a whole group of people who might prefer listening over reading.
Create a New Revenue Stream: It’s a fantastic way to monetize your work in a completely new format.
Build a Deeper Connection: Your own voice brings a level of emotion and personality that text just can't match, creating a stronger bond with your listeners.
You Can Absolutely Do This Yourself
The days of needing a big publishing house and a huge budget to produce an audiobook are long gone. Technology has advanced so much that you can genuinely record a high-quality audiobook right from home. A decent microphone, a quiet room, and a bit of guidance are all you really need to create something that meets the standards of major platforms like Audible.
Honestly, the most important things are a well-prepared script, a clean recording environment, and confident narration. If you just focus on getting these fundamentals right, you’ll already be way ahead of most people who try this and skip the basics.
In this guide, we'll walk you through every part of the process. We'll cut through the technical jargon and give you practical, actionable advice. We'll also show you how a tool like Speak4Me can work as your digital teleprompter, making it so much easier to deliver a smooth, confident performance.
Ready to turn your story into an audio experience people won't forget? First things first, let's get your gear ready. For a much smoother narration, go ahead and Download Speak4Me free on iOS and get your script loaded onto your device.
Get Your Manuscript Ready for Narration
Before you even think about hitting that record button, the real work begins with your manuscript. Seriously. Your entire project's success hinges on this single document. A well-prepared script is your roadmap—it prevents stumbles, keeps your delivery consistent, and will save you from a world of editing headaches down the line.
Think of your manuscript less like a book and more like a musical score. You're mapping out the entire auditory journey for your listener, and this document is what will guide your performance from the first word to the last.
Format Your Script for a Flawless Read
First things first, let's get that text into a narrator-friendly format. The dense paragraphs you see in a standard book are a nightmare to read aloud. You need to give yourself some visual breathing room.
A trick learned early on is to reformat the entire manuscript with double or even triple line spacing. This simple tweak makes it so much easier to track the text with your eyes, meaning you're far less likely to lose your place in the middle of a great take.
Also, bump up the font. Use something clean and easy to read, like Arial or Times New Roman, and set it to at least 12-point size. The goal here is pure readability. You want to minimize eye strain, especially when you're hours into a recording session.
Add Performance Notes and Cues
This is where the magic really happens. Reading your book out loud is a performance, and every actor needs stage directions. Go through your script and start adding notes right into the document. These annotations become your personal director, reminding you how to deliver each line.
Here’s what to focus on:
Pacing and Pauses: Mark every spot where you need to slow down for emphasis or drop in a meaningful pause. A simple note like [slight pause] or [slow down here] can completely change the rhythm and impact of a sentence.
Emotional Tone: Highlight or underline words that need more emotional punch. Sometimes add notes in the margins like [whisper this], [sound frustrated], or [get excited] to guide your vocal tone.
Character Voices: If you're dealing with dialogue, consistency is everything. Make quick notes about each character's voice—maybe one is "gruff and low" and another is "quick and high-pitched." This ensures a character sounds the same in Chapter 10 as they did in Chapter 1.
Pronunciations: Don't guess. For any tricky names, jargon, or foreign words, spell them out phonetically right in the text. For instance, write "Saoirse [SEER-sha]" to make sure you nail it every single time.
A meticulously marked-up script is your single greatest tool for consistency. It frees you from having to remember every performance choice, allowing you to focus purely on delivery when you sit down to record an audio book.
Break Your Book into Manageable Sessions
Trust us, trying to record an entire audiobook in one marathon session is a terrible idea. It’s a fast track to vocal fatigue and a drop-off in quality. The pros plan their recording schedule strategically by breaking the manuscript into smaller, more manageable chunks.
Look at your book’s structure. Chapters are a natural place to start, but don't be afraid to split even a long chapter into two or three separate recording sessions. A good rule of thumb is to keep sessions under two hours. This keeps your voice fresh and your energy high from start to finish.
Use Speak4Me as Your Digital Script Assistant
While marking up a printed script is a time-tested method, it can get a little clunky. This is where a digital tool can really simplify your workflow. Use Speak4Me as a teleprompter, loading your prepared manuscript directly onto your iPad or iPhone.
It lets you scroll through the text at a comfortable pace, which keeps your hands free and your eyes focused on the microphone. The clear display and adjustable speed assist you in maintaining a natural, conversational flow without the distraction of fumbling with papers. All this prep work is the secret to getting that polished, professional sound.
To get your script ready for a seamless recording experience, Download Speak4Me free on iOS.
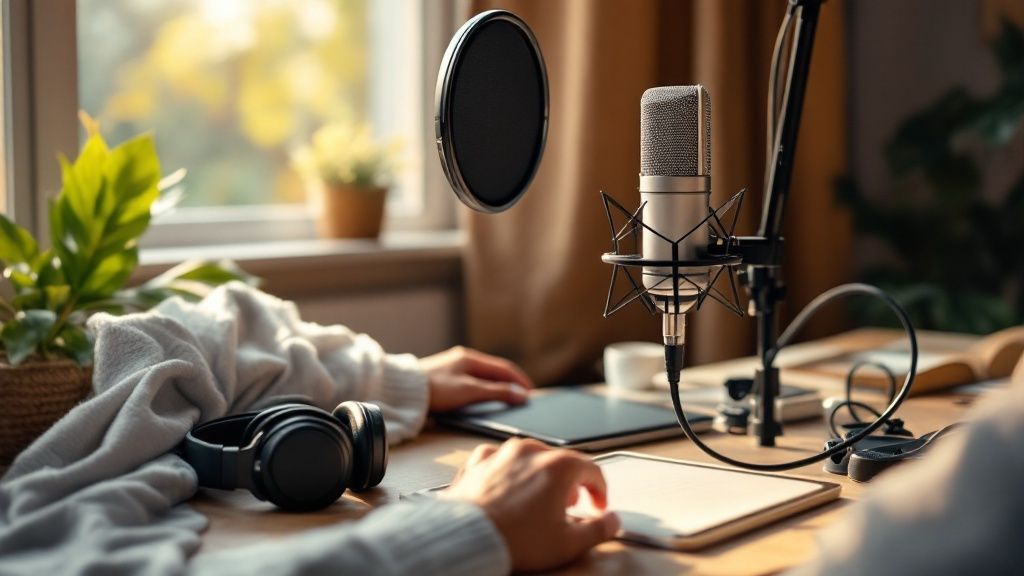
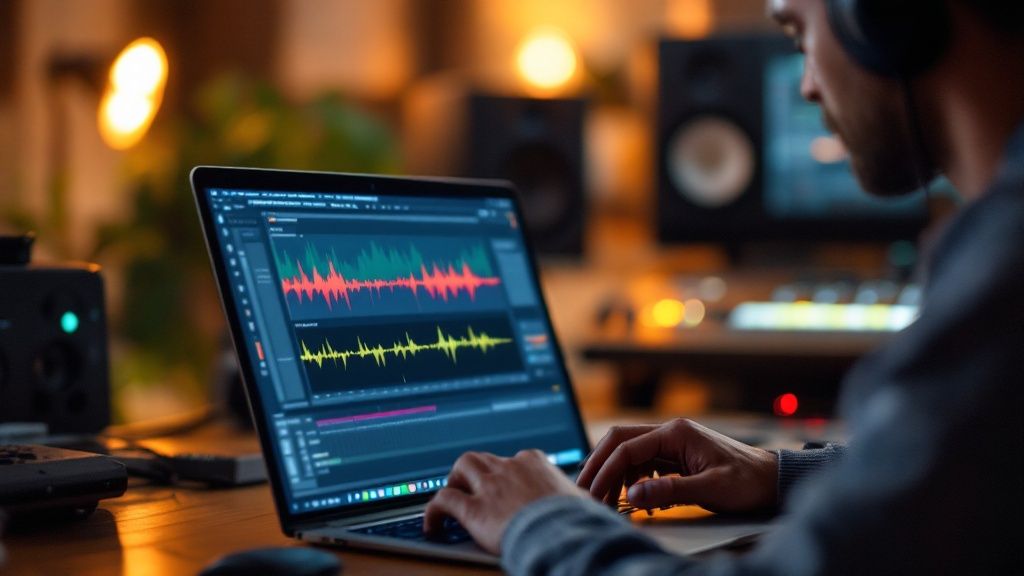
Setting Up Your Home Recording Space
You don’t need a professional, soundproofed studio to record an audio book that sounds incredible. Believe us, amazing productions have come out of walk-in closets. With a little resourcefulness, you can create a high-quality recording environment right in your own home.
The main goal here is to control your sound. You want to kill any echo and block outside noise so the listener hears nothing but your voice.
Find Your Quiet Corner
First things first, find the right room. Look for the quietest, smallest space you have. A walk-in closet is often the perfect candidate because the clothes hanging inside act as fantastic, built-in sound absorbers. It’s also usually tucked away from street noise and other household chaos.
Try to avoid large, empty rooms with hard surfaces like tile floors and bare walls. These spaces are echo chambers and will make your audio sound distant and unprofessional.
Tame the Room with DIY Sound Treatment
Once you've picked your spot, it's time to do some acoustic treatment. You don't need to go out and buy expensive foam panels. Everyday household items can work wonders.
Heavy Blankets & Comforters: Drape these over walls, doors, and even any furniture in the space. They are amazing at soaking up sound waves.
Pillows & Cushions: Stuff these into the corners of the room. This is a great trick for taming the low-end bass frequencies that tend to build up there.
Rugs & Carpets: If you have a hard floor, throwing down a thick rug can make a massive difference in reducing echo.
The idea is simple: cover as many flat, reflective surfaces as you can. This is hands-down one of the most effective ways to get clean, professional sound on a tight budget. It can be helpful to check out what professional audio recording studios use to get a sense of the gold standard, but for a home setup, these tricks are more than enough.
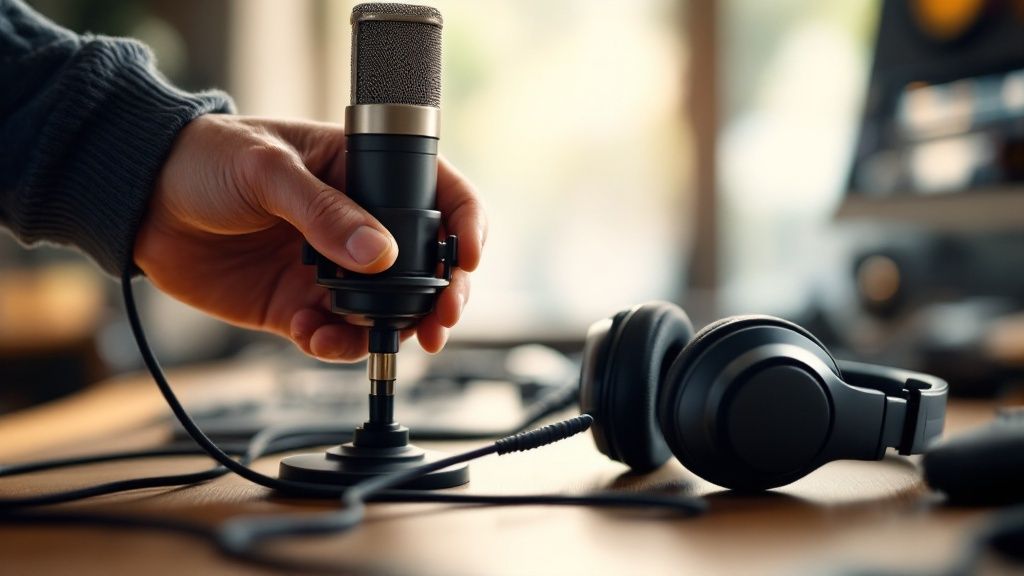
Choosing Your Microphone
Your microphone is the single most important piece of gear you'll buy. It’s what captures your performance, so it pays to get a decent one. For home recording, you’re basically looking at two options: USB or XLR.
A USB microphone is the easiest route. It plugs directly into your computer and just works, making it perfect if you're just starting out. Many modern USB mics deliver fantastic quality that’s perfectly suitable for audiobook production.
An XLR microphone is a step up. It requires a separate piece of hardware called an audio interface to connect to your computer. While this setup is a bit more involved and costs more, it gives you much more flexibility and often better audio quality. It's the way to go if you see yourself doing more serious audio work down the line.
Home Studio Equipment Comparison
Choosing the right gear can feel overwhelming, so here’s a quick breakdown to help you decide based on your budget and goals. This table covers the essentials for a solid home recording setup.
Equipment | Budget Option (Good) | Mid-Range Option (Better) | Pro-Level Option (Best) |
|---|---|---|---|
Microphone | Audio-Technica AT2020 (USB) | Rode NT1 | Neumann TLM 102 |
Audio Interface | (Not needed for USB mic) | Focusrite Scarlett 2i2 | Universal Audio Apollo Twin |
Headphones | Sony MDR-7506 | Beyerdynamic DT 770 Pro | Sennheiser HD 650 |
Pop Filter | Basic Nylon Mesh Filter | Stedman Proscreen XL | Metal Mesh Pop Filter |
DAW Software | Audacity (Free) | Reaper ($60) | Adobe Audition (Subscription) |
Ultimately, the best equipment is the equipment you have. Start with what your budget allows and focus on getting your recording space and technique right. You can always upgrade later.
The Non-Negotiable Pop Filter
No matter which microphone you choose, a pop filter is an absolute must-have. This is the little screen that sits between your mouth and the mic. Its job is to stop the harsh "p" and "b" sounds—we call them "plosives"—from causing a distorted popping noise in your recording.
A good pop filter is cheap but makes a world of difference in the clarity of your audio. Skipping it is one of the most common mistakes new narrators make, and it instantly flags a recording as amateurish.
This image gives you a great visual of how a few simple adjustments to your setup can lead to major improvements in sound quality.
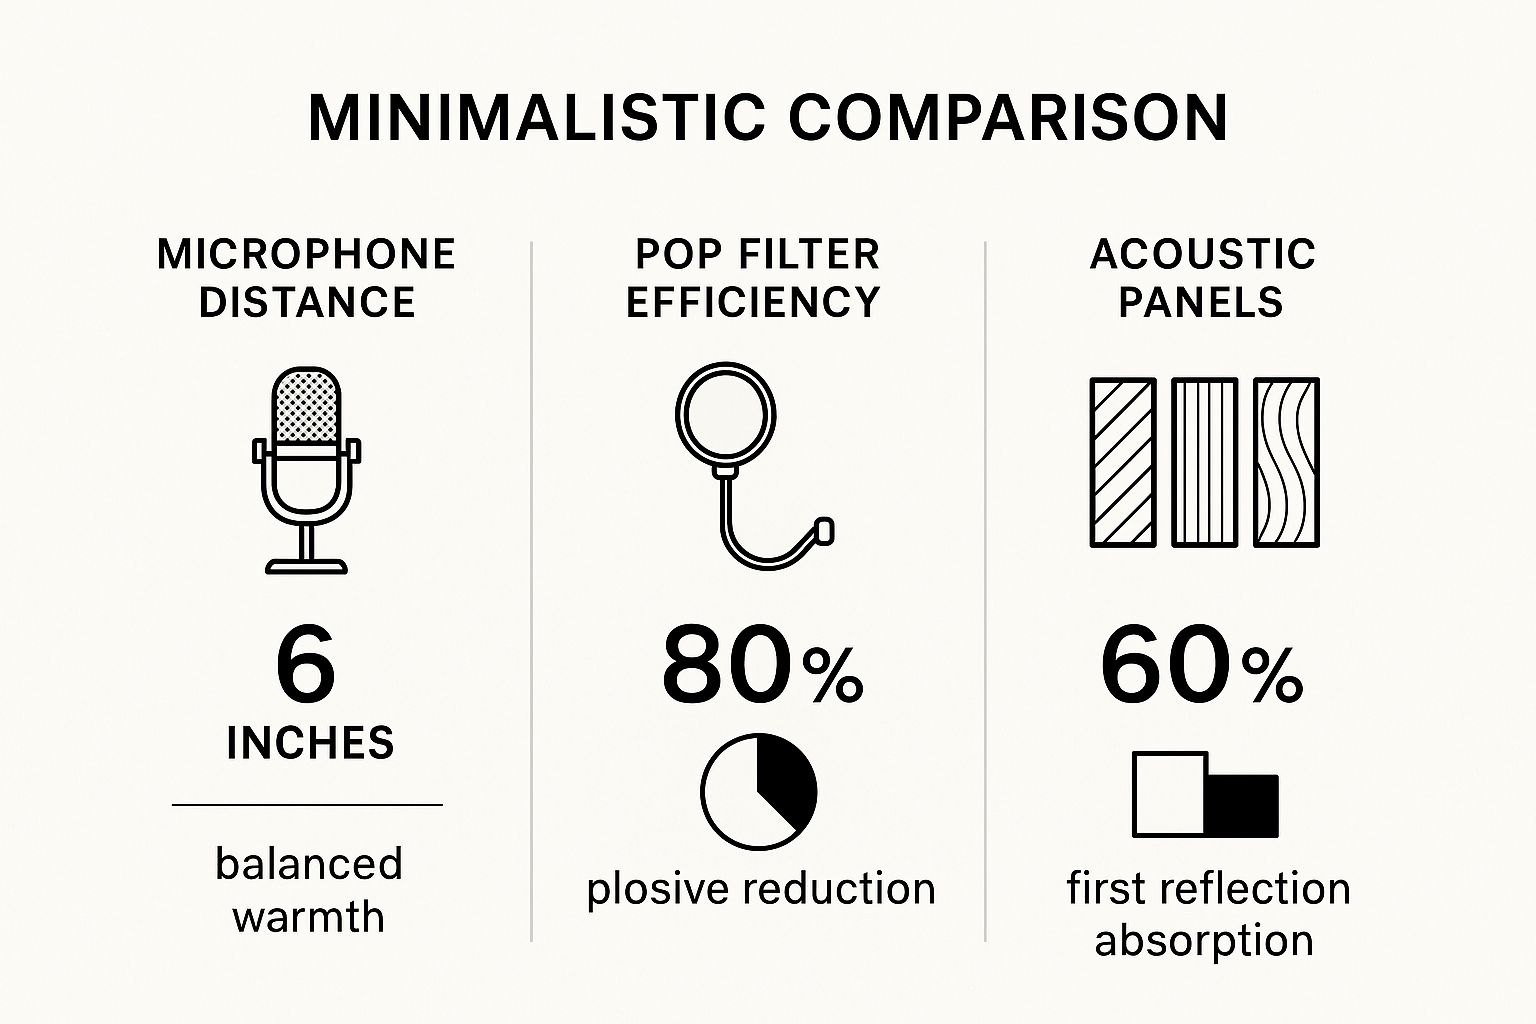
As you can see, simple best practices like using a pop filter and maintaining the right distance from the mic are incredibly effective. It’s all about capturing clean, professional-grade audio from the very start.
The Growing Demand for Audio Content
Perfecting your home studio is more important now than ever. Audio content is exploding, and audiobooks have become the fastest-growing part of digital publishing. It’s a real shift in how people connect with stories.
In the U.S. alone, audiobook revenue recently hit about USD 2.22 billion, which is a 13% jump from the previous year. And get this: over 51% of Americans aged 18 and older have listened to an audiobook. This isn't a niche hobby anymore; it's a massive, mainstream market.
Your recording space is the unseen character in your audiobook. A quiet, well-treated room ensures your voice is clear and present, allowing your story to connect with listeners without any distractions.
Once your space is ready and your mic is set up, the next challenge is managing your script. Fumbling with papers or scrolling through a clunky document can kill your flow and ruin a great take. For a smooth, professional workflow, you need a reliable teleprompter. Download Speak4Me free on iOS to see how it can help.
Mastering Your Voice and Narration Technique
Your voice is the instrument that will carry your entire story. It’s what pulls listeners in, builds the world, and makes characters feel real. A polished narration technique is what separates a homemade recording from a professional production that has people hooked from the first sentence.
It's about more than just reading words on a page. You need control, consistency, and a genuine connection to the story you're telling. With a bit of practice, you can develop a voice that not only sounds great but keeps your audience glued to their headphones for hours.
Don't Skip the Vocal Warm-Ups
Seriously, don't. Before you even think about hitting record, you need to warm up your voice. Just like a runner stretches before a race, these exercises protect your vocal cords from strain and make you sound clearer and more resonant. A "cold" voice sounds flat and you'll tire out fast.
A few minutes with these simple exercises will make a world of difference:
Lip Trills: You might feel a little silly, but vibrating your lips together with a "brrr" sound is fantastic for relaxing your facial muscles and getting your breath support in order.
Humming: Gently hum up and down your vocal range. It’s a low-impact way to wake up your vocal cords without stressing them.
Tongue Twisters: Fire off a few rounds of "red leather, yellow leather" or "unique New York." This gets your mouth moving and preps you for tricky phrasing.
Five to ten minutes is all it takes. This simple habit will massively improve the quality and stamina of your voice for every single session.
Finding Your Pacing Sweet Spot
The right pace is absolutely critical. If you rush, listeners won't be able to keep up. Go too slow, and their minds will start to wander. You're aiming for a natural, conversational rhythm that feels just right.
As a rule of thumb, most professional narrators land somewhere around 150-160 words per minute. But think of this as a starting point, not a hard rule. A tense action scene might need you to pick up the pace, while a thoughtful, emotional moment calls for you to slow things down.
The real secret is variation. A dynamic narrator uses changes in pace to build suspense, highlight important ideas, and keep the listener engaged. A flat, monotonous pace is the fastest way to lose an audience.
To get a feel for your own pacing, try reading passages aloud and recording yourself. An app like Speak4Me can double as a teleprompter, letting you tweak the scroll speed until you find a rhythm that feels comfortable and sounds natural.
Keeping Your Breath and Energy Steady
Loud, gasping breaths are the tell-tale sign of an amateur recording. Good narration comes from good breath control. The key is to breathe from your diaphragm—your belly should expand when you inhale, not your chest. This gives you a bigger tank of air and assists you in delivering long, smooth sentences without running out of steam.
It's also crucial to keep your energy consistent. Your voice at the end of a two-hour session can sound tired and weak compared to when you started, and your listeners will notice. Break your work into shorter, manageable chunks. Take regular breaks to give both your voice and your brain a rest.
Making Characters and Emotions Leap Off the Page
If your book has dialogue, giving each character a distinct voice is a surefire way to draw your audience deeper into the story. You don't have to be a master impressionist. Often, simple shifts in pitch, tone, or speed are all it takes to create a believable and memorable cast.
When it comes to emotion, authenticity is everything. You have to connect with what the characters are feeling in each scene. If a character is heartbroken, let your voice soften and crack just a little. If they're ecstatic, inject that bright energy into your delivery. For a deeper dive into these skills, you might want to explore the world of professional voice over work.
The audiobook market is booming. The global market, valued at around USD 8.7 billion, is on track to hit an incredible USD 35.47 billion by 2030. That growth signals a huge, hungry audience waiting for great audio content.
To start practicing your narration and dial in the perfect delivery for your story, Download Speak4Me free on iOS and turn your phone into a powerful rehearsal studio.
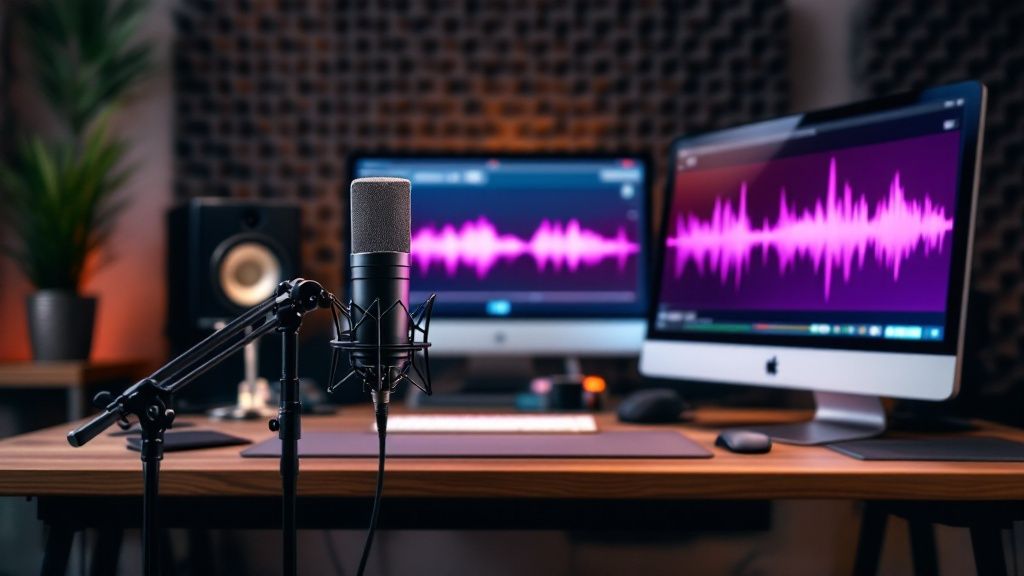
Editing and Mastering Your Audio Like a Pro
Recording your voice is a massive milestone, but the journey to a professional-sounding audiobook isn't quite over. Now comes the real magic: editing and mastering. This is where you take those raw audio files and transform them into a polished, seamless listening experience that will hook your audience.
Don't let the technical jargon scare you off. Post-production is really just a series of small, manageable tasks. With a bit of patience and the right tools—many of which are free—you can clean up your audio, balance the sound, and make sure you meet the strict standards of platforms like Audible.
The First Pass: Cleaning Up Your Tracks
The first thing you’ll want to do is listen back to everything you've recorded, but this time with a critical ear. This initial edit is all about snipping out the obvious distractions that can pull a listener right out of the story.
Think of it as tidying up the room before you start decorating. You're hunting for:
Mistakes and Stumbles: Any flubbed lines, repeated words, or false starts have to go.
Long Pauses: Trim any unnatural silences that kill the pacing and make the narration feel disjointed.
Extraneous Noises: Listen carefully for mouth clicks, loud breaths, stomach rumbles, or any other background sounds your microphone managed to pick up.
The goal here is to create a clean foundation to build upon. When you record an audio book, getting a clean take from the start will save you a ton of time in this phase, though no recording is ever perfect. Using a "punch and roll" technique, where you immediately re-record a mistake, can also dramatically cut down on this cleanup work.
Applying the Essential Audio Effects
Once your tracks are tidy, it’s time to really make your voice shine. This involves using a few key audio effects that are standard in most editing software, including fantastic free options like Audacity.
Noise Reduction
Even in the quietest home studio, there's always a little bit of background noise, often called "room tone." It could be the hum of your computer fan or the faint whoosh of an air conditioner. The noise reduction tool cleverly samples this ambient sound and then subtracts it from your entire recording, leaving just your voice behind.
A light touch is absolutely crucial here. Overdoing it with noise reduction can make your voice sound thin, watery, or robotic. Always aim for a natural sound, even if it means a tiny bit of room tone remains.
Equalization (EQ)
Think of Equalization, or EQ, as a sophisticated tone control for your voice. It lets you boost or cut specific audio frequencies to improve clarity and add warmth. For instance, you might gently roll off some of the low, rumbly "bass" frequencies to eliminate any muddiness. Or, you could add a slight boost to the higher frequencies to give your voice more presence and make it sound crisper.
Compression
Your vocal performance naturally has a wide dynamic range—some parts are loud, and others are quiet. Compression simply narrows the gap between the loudest and softest parts of your narration. This creates a much more consistent and pleasant volume for the listener. It ensures your whispers are still audible and your excited shouts aren't jarringly loud.
Mastering for Distribution
Mastering is the final, critical step. It’s all about taking your beautifully edited audio and getting it ready to meet the specific technical standards required by distributors like Audible's ACX (Audiobook Creation Exchange).
ACX, for example, has very strict audio submission requirements. They’re not just suggestions; your audiobook will be rejected if it doesn’t meet them.
Peak Volume: Your audio can't be louder than -3dB. This is a hard ceiling that prevents any ugly distortion or clipping.
RMS Levels: The overall loudness, or RMS (Root Mean Square), has to fall somewhere between -23dB and -18dB. This ensures your audiobook's volume is consistent with all the other titles on the platform.
Noise Floor: The background noise in your final audio must be lower than -60dB. This is where that careful noise reduction pays off.
These numbers might seem abstract at first, but your editing software has tools that can analyze your files and help you dial them in perfectly. Proper mastering supports your audiobook sounding professional and provides a flawless listening experience for everyone, no matter what device they're using.
Getting your manuscript ready beforehand can make this whole process smoother; learn more by exploring the benefits of reading aloud for preparation in our guide.
Editing is where you truly shape the final product. Taking the time to do it right ensures that all your hard work in the recording booth pays off. And to make that initial recording step as smooth as possible, consider managing your script with a digital prompter. Download Speak4Me free on iOS to keep your narration flowing perfectly from the start, which means less time fixing mistakes later.
Got Questions About Recording Your Audiobook? Let's Dig In.
Jumping into your first audiobook recording project can feel a bit daunting. You’ve probably got a dozen questions swirling around, from how much time this will really take to the common mistakes you need to sidestep. Don't worry, that's completely normal.
Think of this as a frank conversation where we tackle those questions head-on. Getting a handle on these details now will save you a ton of headaches later and set you up for a much smoother process.
How Long Does It Really Take to Record an Audiobook?
This is the big one, isn't it? The honest answer is that it depends on your book's length and how comfortable you are behind the mic. But a solid rule of thumb in the industry is the 4-to-1 ratio. For every single hour of finished audio you want to produce, expect to spend at least four hours making it happen.
That time isn't just you talking into a microphone. It includes all the prep work, the actual recording, and the nitty-gritty of editing and mastering. So, if you're aiming for a 10-hour audiobook (that's about 90,000 words), you should plan for 40 to 60 hours of work. It sounds like a lot, but if you break it down into focused sessions, it's totally achievable.
What are the Most Common Mistakes I Should Avoid?
Oh, the rookie mistakes. We've all been there. The good news is that you can avoid them just by knowing what to look for. One of the biggest tells of an amateur recording is inconsistent pacing, where the narrator speeds up and slows down without reason from one chapter to the next. Another classic blunder is ignoring your room's sound, which leaves you with that hollow, echoey audio that just screams "homemade."
Here are a few other traps to watch out for:
Those Pesky Mouth Noises: Annoying clicks, pops, and gasps for air can really pull a listener out of the story. Staying hydrated is a simple but surprisingly effective fix.
Skipping Your Homework: If you don't mark up your script with notes on tone, pauses, and character voices, your delivery will sound flat and robotic.
Recording When You're Drained: Your voice gets tired, and trust us, listeners can hear it. Always try to record when you feel rested and sharp.
A little secret from the pros? They treat their preparation time just as seriously as their recording time. Planning ahead is what separates a frustrating editing marathon from a smooth, enjoyable process.
Do I Really Need Fancy Software to Edit This Thing?
Nope, not at all. It's easy to think you need to shell out for high-end software like Pro Tools, but you can produce a professional-sounding audiobook with incredible free tools. By far the most popular choice is Audacity. It's a powerhouse open-source editor that gives you everything you need to get the job done right.
With a tool like Audacity, you can easily handle all the key tasks:
Removing background noise
Adjusting EQ for a richer tone
Applying compression for consistent volume
Normalizing the final audio to meet industry standards
The magic isn't in the price tag of your software; it's in knowing how to use these fundamental tools to make your audio shine. Tons of successful indie authors produce amazing audiobooks using nothing but Audacity. And if you ever get stuck on the technical side, our team is here to help. You can find guides and get in touch through the Speak4Me support center.
How Can I Get That Professional "Studio Sound" at Home?
This is more about technique and environment than it is about expensive gear. The absolute most important thing you can do is treat your recording space. Find the quietest room in your house—a walk-in closet filled with clothes is an audio narrator's best friend because the fabric soaks up sound. Drape blankets over walls and lay pillows on the floor to kill any echo from hard surfaces.
From there, a good-quality USB microphone and a pop filter are your next best investments. That little mesh screen is a game-changer for stopping those harsh "p" and "b" sounds from ruining a take. Combine a treated room, a pop filter, and some basic editing cleanup, and you'll be 90% of the way to achieving studio-level quality without the studio price tag.
Ready to make your narration sound as smooth and confident as the pros? Speak4Me acts as your personal teleprompter, letting you focus on your performance instead of fumbling with pages.
Download Speak4Me free on iOS and give your audiobook project the polished delivery it deserves.
Try Speak4Me for Free
