Mastering Professional Voice Over Recording

Getting a professional voice-over recording from home really boils down to two things: a good microphone and a space that doesn't sound like a bathroom. Seriously. If you can nail those two, you're halfway there. Investing in a decent condenser mic and taking the time to deaden the echo in your room are the absolute best first moves you can make. This is the foundation of your whole setup.
Building Your First Home Recording Studio
Here's a secret most beginners miss: great audio isn't just about your voice; it's about the room. Before you even think about hitting that record button, you need a space that lets your voice shine without adding a bunch of unwanted noise.
The good news is that pro-level home studios are more achievable now than ever. The whole industry has shifted, with more and more work being done remotely. Since 2020, the reliance on big, expensive studios has dropped dramatically, opening the door for talent everywhere. You can read more about this industry shift to see how much things have changed.
What does that mean for you? It means your home setup has to be up to par. Let's talk gear.
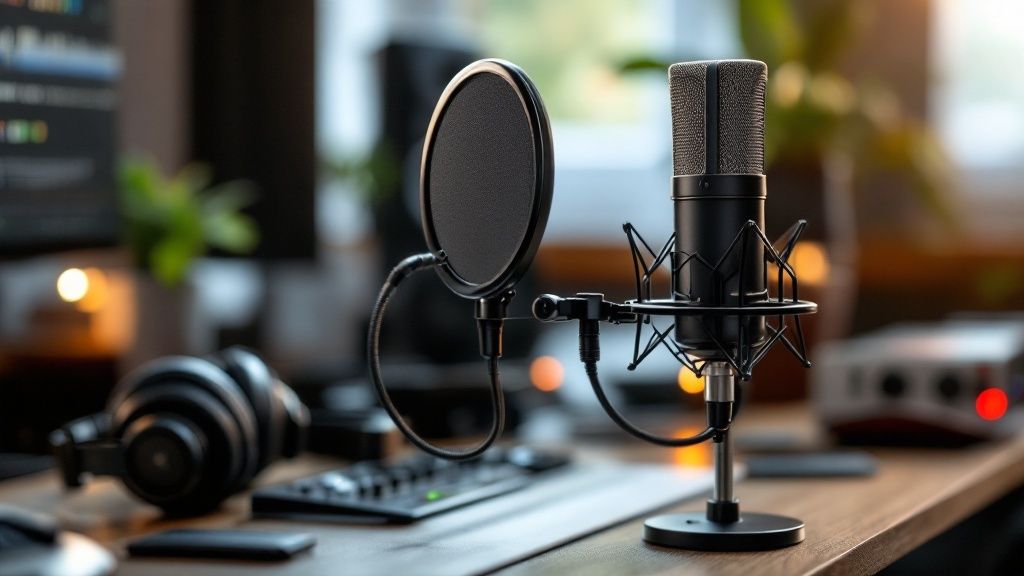
Choosing Your Microphone
Your mic is the heart of your entire recording chain. It's where the magic starts. You’ll mainly be looking at two types: condenser and dynamic.
Condenser Mics: These are the gold standard for most studio voice-over work. They’re incredibly sensitive and pick up all the rich detail and subtle nuances in your voice. This makes them perfect for commercials, narration, and audiobooks. The catch? That sensitivity means they'll also pick up your air conditioner, the dog barking next door, and your stomach rumbling. You need a quiet, treated room for these.
Dynamic Mics: These are the tough workhorses of the audio world. They’re less sensitive and built to reject sound from the sides, making them fantastic if your recording space is less than perfect. Think radio DJs, podcasters, and high-energy video game characters—that's where dynamics often shine.
For most people starting out in a dedicated home space, a large-diaphragm condenser microphone is the way to go. It just captures that sound clients are looking for.
The Rest of Your Essential Gear
A mic is just the beginning. You'll need a few other non-negotiable items to get clean, professional audio.
Here's a quick rundown of what you’ll need to get started, from budget-friendly choices to the gear you'll find in most pro studios.
Essential Voice Over Gear Comparison
Equipment Type | Budget-Friendly Option | Professional Standard | Key Purpose |
|---|---|---|---|
Audio Interface | Focusrite Scarlett 2i2 | Universal Audio Apollo Twin | Connects your mic to the computer and converts the signal from analog to digital. |
Pop Filter | Nylon Mesh Pop Filter | Stedman Proscreen XL | Sits in front of the mic to stop those harsh "p" and "b" sounds (plosives). |
Shock Mount | Included with Mic | Rycote InVision USM | Suspends the mic to isolate it from vibrations coming up through the stand. |
Headphones | Sony MDR-7506 | Beyerdynamic DT 770 PRO | Lets you monitor your recording in real-time without the sound bleeding into the mic. |
These pieces work together as a system. The interface powers the mic, the shock mount keeps it steady, and the pop filter protects the recording from your breath. Don't skip them!
This simple chart lays out the journey: get your gear, treat your room, and then start recording.
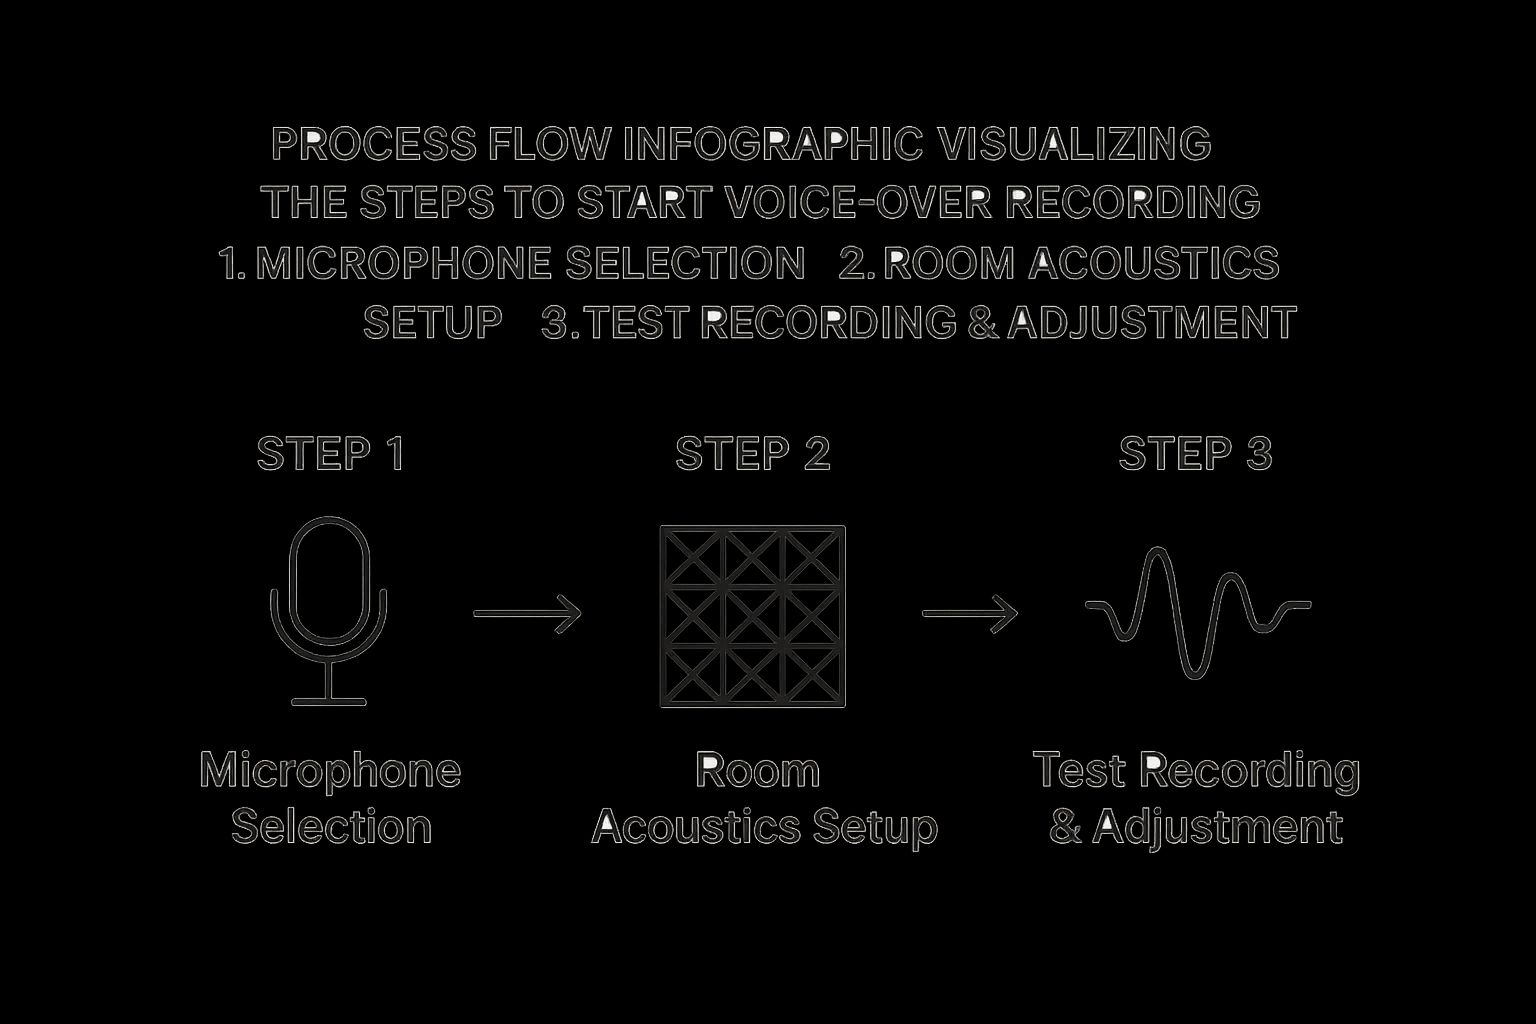
As you can see, sorting out your equipment and your room acoustics are the two tracks you need to focus on before you can get a solid test recording.
And speaking of practice, having a tool on your phone to run through scripts is incredibly useful for checking your sound on the fly. You can download Speak4Me free on iOS to start recording and polishing your delivery anytime, anywhere.
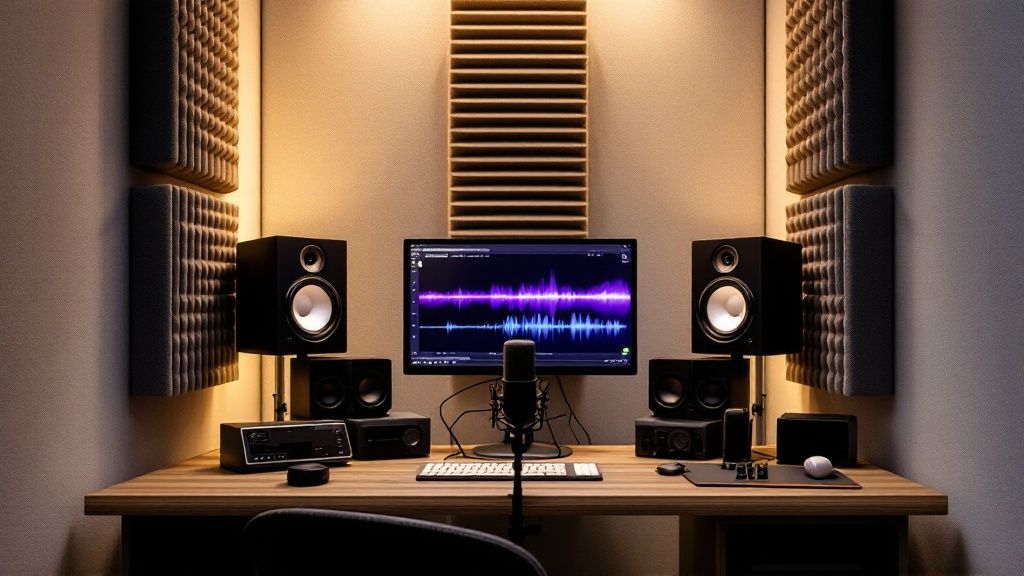
Setting Up Your Software and Taming Room Noise
You’ve got your mic and interface plugged in. Great. Now comes the part that separates the pros from the amateurs: taming your recording space and dialing in your software. This is where the magic really happens—on your screen and in the room around you.
Your command center for all this is your software, usually called a Digital Audio Workstation, or DAW. You’ve got great options, from the fantastic and free Audacity to industry powerhouses like Adobe Audition and Logic Pro X. It's easy to get overwhelmed by all the buttons and dials, but for now, just focus on two key settings.
For any professional voice-over job, you'll want to set your project to a sample rate of 48 kHz and a bit depth of 24-bit. These are the industry-standard numbers. Think of it this way: sample rate is how many "snapshots" of your voice are taken per second, and bit depth is the amount of detail in each snapshot. Sticking to these settings gives you crisp, high-quality audio with plenty of room to work during the editing phase.
Nailing Your Recording Levels
Before you even think about hitting that red record button, you have to set your input level, also known as "gain." Honestly, getting this right can make or break a recording session. The goal is simple: capture a strong, clean signal without it being so loud that it distorts. That ugly, crackly distortion is called clipping, and it’s an instant take-ruiner.
Here’s a solid rule of thumb: watch the meter in your DAW and aim for your voice to hover somewhere between -18dB and -12dB for most of your speech. When you hit your loudest, most energetic lines, the peaks shouldn't creep past -6dB. This buffer zone, called "headroom," is your safety net. It keeps you from clipping while making sure your voice isn't so quiet that it gets lost in the background noise.
Killing Room Noise and Pesky Echo
Even the most expensive microphone on the market will sound awful in a bad room. The biggest culprits are hard, flat surfaces—bare walls, ceilings, wood floors. They’re like acoustic mirrors, bouncing your voice all over the place and creating the echo and reverb that screams "amateur recording."
Your mission isn't soundproofing, which is about blocking noise from the outside. It's acoustic treatment, which is all about absorbing sound reflections inside the room. That’s how you get that clean, direct "studio" sound.
The good news? You don't need to go broke buying fancy acoustic foam panels right away. You can get surprisingly good results with stuff you probably already have lying around the house.
Soften Your Surfaces: Hang up some heavy blankets or thick comforters on the walls around your desk. There's a reason walk-in closets full of clothes are a legendary trick for home recording—all that fabric is a fantastic sound absorber.
Don't Forget the Floor and Ceiling: A thick rug on the floor can work wonders. If possible, try temporarily placing a spare duvet or some pillows on the ceiling right above where you'll be sitting.
Find the Sweet Spot: Try this. Stand in the middle of your room and give a loud, sharp clap. Hear that ringing echo? Now walk around the room, clapping as you go. You're listening for the spot where that echo dies the quickest. That's your sweet spot for recording.
Once you’ve got your software dialed in and your room treated, you’ve created a clean canvas for your voice to be the star. When you're ready to start practicing your scripts in that perfectly tuned space, Download Speak4Me free on iOS.
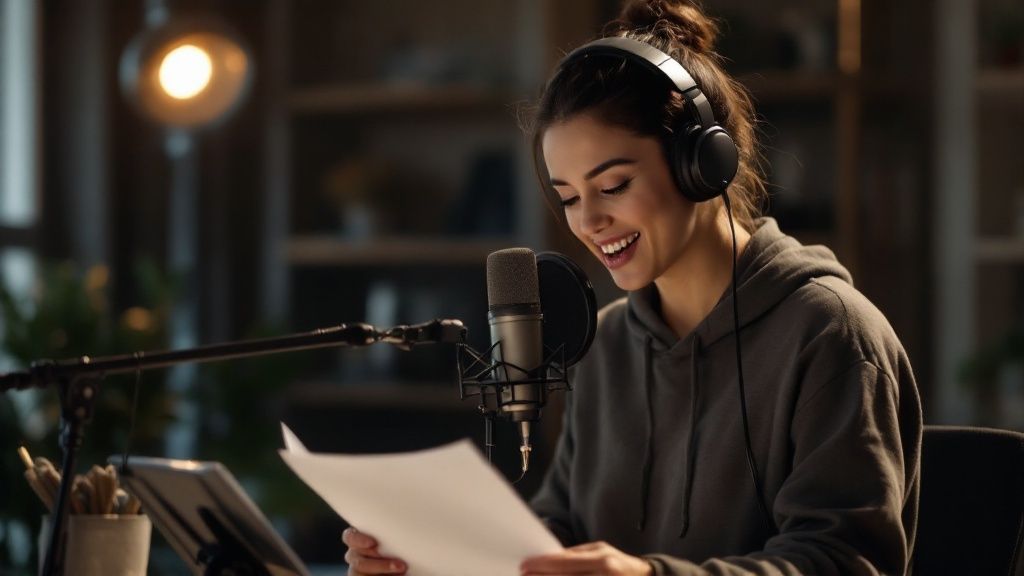
Finding Your Voice at the Microphone
Alright, your gear is set up, the room sounds good, and your software is humming along. Now for the main event: your performance. This is where all the tech fades into the background. Your voice is the instrument, and learning how to "play" it in front of the microphone is what turns a decent recording into a truly great one.
It all begins with how you approach the mic. Good mic technique is more than just sounding clear; it’s about controlling the sound at the source, before it even gets to your computer. One of the first things you'll contend with is the proximity effect—a fancy term for how the bass in your voice gets a huge boost the closer you get to the mic.
Get right on top of it, and you’ll sound boomy and muffled. Back away too far, and you'll sound thin, distant, and start picking up more of the room's ambient noise. The sweet spot is usually around 6 to 12 inches away. A good rule of thumb is the "shaka" hand gesture; the distance from your thumb to your pinky is a great starting point. This range gives you that warm, present sound you're after without being overpowering.
Warming Up for a Strong Performance
You wouldn't run a race without stretching, right? The same goes for your voice. Jumping into a recording session cold is a recipe for vocal strain and a flat, uninspired delivery. A few minutes of simple exercises can make a massive difference in your articulation, control, and stamina.
Lip Trills: You might feel silly doing it, but making "lip bubbles" by blowing air through your lips is one of the best ways to relax your face and warm up your breath support without hurting your vocal cords.
Tongue Twisters: Fire up those articulators. Run through classics like "red leather, yellow leather" or "unique New York." The goal isn't speed at first—it's clarity. Focus on making every single sound crisp, then pick up the pace.
Humming: Gently humming up and down your natural vocal range is a fantastic, low-impact way to get your vocal folds ready for action. It primes your voice for whatever the script demands.
Think of these warm-ups as your pre-session ritual. They get you physically and mentally ready to perform, helping you stay consistent from the first take to the last.
Controlling Plosives and Sibilance
Two little audio gremlins are notorious for ruining perfectly good takes: plosives and sibilance. Plosives are those big, ugly pops of air from "p" and "b" sounds that slam into the microphone. Sibilance is the piercing, hissing sound that can come from "s" and "sh" sounds.
A pop filter is your first line of defense, but great mic technique is the ultimate fix. Try positioning the mic slightly off-axis. Instead of having it directly in front of your mouth, angle it a bit to the side. Now, that blast of air from a "p" sound shoots right past the microphone instead of hitting it head-on.
This tiny adjustment can make a world of difference in your voice over recording, saving you a ton of frustration in the editing booth later.
As for sibilance, staying hydrated can help, as can simply being mindful not to over-pronounce those "s" sounds. The best way to track your progress is to hear it for yourself. Record your practice reads and listen back. You can even Download Speak4Me free on iOS to get instant feedback on how your mic adjustments are changing your sound.
Polishing Your Audio to a Professional Standard
So you’ve hit "stop" on the recorder. Great take! But that's really just the halfway point. The raw audio file has your performance, but the real magic—that crisp, clean sound that makes clients happy—happens in post-production. This is where you turn a good recording into a great one.
The idea isn't to make yourself sound like a robot or slather on a bunch of effects. It's about making subtle, invisible edits that just make your natural delivery sound better. The best way to do this is with a clean workflow, starting with the big-picture fixes before getting into the nitty-gritty details.
The Core Editing Workflow
Before you even think about adding any fancy effects, your first job is to clean up the performance itself. This means putting on your headphones and listening through the entire voice over recording from start to finish, trimming out all the stuff you don't need.
A solid workflow usually looks something like this:
Chop Out the Mistakes: This is the most obvious part. Get rid of any flubbed lines, stumbles, or those long, awkward pauses where you were gathering your thoughts. The goal is a seamless take where no one can even tell you made an edit.
Fine-Tune the Pacing: Now, listen to the rhythm. You can adjust the space between words and sentences to really nail the timing. Sometimes adding a fraction of a second to a pause can build suspense, while tightening the gaps can give the read a more energetic feel.
Tame the Breaths: This is a big one. You don't want to delete every single breath, because that sounds completely unnatural and weird. The trick is to simply lower the volume of any loud, distracting gasps so they're still there, but they don't jolt the listener.
If you really want to get serious about efficiency, you can dive deeper into a master podcast editing workflow for professional results which has tons of great tips for structuring your editing sessions.
Using Basic Tools to Add Clarity
Once the performance itself is locked in, it’s time for some light processing to make your voice pop. Remember, less is more. The only three tools you really need to get started are noise reduction, EQ, and compression.
First up is Noise Reduction. Even in a quiet, treated space, there's always a little bit of background hiss or hum from your gear or the room tone. A light touch of noise reduction gets rid of this "noise floor," making the silent parts of your recording truly silent.
The key here is to be gentle. If you go overboard with noise reduction, you’ll get strange digital sounds and your voice will end up sounding thin and watery. Just apply enough to clean up the hiss without messing with your vocal quality.
Next, you’ll use Equalization (EQ). Think of EQ as a sophisticated tone knob for your voice. You can use it to boost certain frequencies to add a bit of warmth or clarity, or you can cut frequencies that are making the recording sound muddy or harsh. For most voices, a tiny boost in the upper-midrange can make a huge difference in presence.
Finally, there’s Compression. This tool is all about evening out your volume levels. It automatically reduces the volume of the loudest parts of your performance and brings up the quietest parts. This creates a much more consistent, professional sound so your listener isn't constantly reaching for their volume control. And for projects that need quick audio solutions, you can always learn more about tools like a voice over generator for different uses.
Ready to practice on your own scripts and hear what a difference this makes? Download Speak4Me free on iOS to start recording and reviewing your own takes.
Breaking Into the Modern Voice Over Market
Having the right gear and a killer recording space is a huge part of the equation. But to build a real career, you need to know where the work actually is. The voice over world is bigger than ever, with new doors opening in some really exciting areas. If you can spot these trends, you can get ahead of the curve and build a career that lasts.
We're seeing a massive boom in demand for talented artists, especially in fields like animation, video games, corporate training videos, and e-learning. The cool part is that each of these requires a totally different vibe and skill set. This gives you a great opportunity to find a niche that plays to your natural strengths.
Finding Your Sweet Spot in the Industry
So, where do you fit in? Think about the global market for a second. Companies are constantly trying to reach new audiences, which means they need content localized for different regions. If you're bilingual or have a great ear for accents, you're already holding a winning ticket. That's a serious advantage.
The explosion of digital content is what’s really driving this growth. It’s not just a feeling; the numbers back it up. A recent report found that by 2025, 52% of companies are planning to use voice overs for their brand marketing, and another 45% are looking for talent for animation projects. This isn't a niche industry anymore—skilled voice actors are essential.
The real secret to success is finding that intersection where your natural voice and style meet a real market need. Are you a fantastic storyteller who could get lost in an audiobook for hours? Or is your voice more clear and authoritative, making you a perfect fit for corporate e-learning modules?
To give you a better idea of where the opportunities are, let's break down the major market segments. Each one has its own unique demands and required skills.
Top Voice Over Market Segments
Market Segment | Common Project Types | Key Skills Required |
|---|---|---|
Animation & Gaming | Cartoons, Animated Films, Video Game Characters, Mobile Games | Character acting, vocal range, ability to take direction, consistency |
E-Learning & Training | Corporate Training Modules, Educational Videos, How-To Guides | Clear and engaging delivery, authoritative yet approachable tone |
Advertising | TV & Radio Commercials, Online Ads, Promos | Persuasive and energetic delivery, ability to convey emotion quickly |
Audiobooks | Fiction and Non-Fiction Narration, Children's Books | Storytelling ability, stamina for long-form content, character differentiation |
Corporate Narration | Brand Videos, Product Demos, Company Presentations | Professional and trustworthy tone, precise enunciation |
Understanding these categories can help you narrow your focus and start marketing yourself to the right clients.
Of course, to even get noticed, you need a professional online presence. That starts with how you present yourself, so it’s worth learning about creating a professional DIY headshot. You can also dive deeper into the business side of things to learn how Speak4Me assists you.
Your Top Voice Over Recording Questions, Answered
Every voice actor starting out has a ton of questions. Instead of getting lost in a sea of conflicting advice online, let's cut right to the chase. Here are clear, straightforward answers to the most common hurdles you'll face.
What’s the Best Mic for Voice Over Work?
For most home studios, you can't go wrong with a large-diaphragm condenser microphone. These mics are incredibly sensitive and fantastic at capturing all the subtle, rich details of your voice, which is exactly what you want for narration, commercials, or audiobooks.
But that sensitivity can be a double-edged sword. Condenser mics pick up everything, so they demand a quiet, well-treated room to sound their best.
If your space has a bit of background noise you can't eliminate, a dynamic microphone might be a better, more forgiving choice. They're less sensitive to ambient sound and are workhorses for more energetic reads, like promos or video game characters.
How Do I Soundproof a Room Without Going Broke?
Let's clear something up: true soundproofing—which blocks outside noise—is a massive construction project. What most of us really need is acoustic treatment, which is all about controlling the sound inside the room. The goal here is to kill the echo by absorbing sound reflections.
You can get amazing results on a tight budget. Find a small space, like a walk-in closet, and fill it with soft, absorbent stuff.
Hang heavy blankets or moving pads on the walls.
Throw a thick rug or even a spare duvet on the floor.
Cover up any other hard, reflective surfaces like desks, windows, or bookshelves.
This simple setup "deadens" the room, giving you that clean, professional sound without spending a fortune.
What Audio File Format Do Clients Expect?
Always double-check the client's specs, but the industry standard is a high-quality, uncompressed audio file. Sending a low-quality MP3 as a final file is a dead giveaway that you're an amateur.
Your go-to delivery format should almost always be a 24-bit, 48kHz mono WAV file. An MP3 is fine for a quick audition sample, but the final product needs to be in a lossless format like WAV or AIFF. This preserves every ounce of your performance for the client’s production team to work with.
How Can I Get Rid of Annoying Mouth Clicks?
Mouth clicks, pops, and smacks are the bane of every voice actor's existence. The good news is that you can often prevent them before you even hit record. It usually starts with hydration.
Make sure you drink plenty of room-temperature water before and during your session. A classic trick many pros swear by is eating a tart green apple beforehand—the acidity helps cut through the sticky saliva that causes those clicks. While you can always edit them out later, preventing them in the first place will save you hours of tedious work.
The demand for authentic human voices is stronger than ever. The voice over market is projected to hit USD 8.6 billion by 2034. And even with AI in the picture, skilled human actors still command over 58% of the market share, proving that genuine talent is irreplaceable. Read more about the dubbing and voice over market.
Practicing your delivery and getting that clean narration down is so much easier with the right tools. With Speak4Me, you can record your scripts on the go, listen back instantly, and fine-tune your performance from anywhere. Download Speak4Me free on iOS and start practicing today.
Try Speak4Me for Free
